
Heaven's Gate ~Road to the Promised Land~
Angelic Advent is the first chapter of Riviera: The Promised Land. During this chapter, Ein and Ledah go through Heaven's Gate in order to activate the Retribution, during which Hector, one of the Seven Magi, urges them to hurry up and asks for a report occasionally.
This is also the chapter in which the player learns the controls, battling system and leveling up through Rose, Ein's familiar.
Stage Ranking[]
| Rank | S | A | B | C |
|---|---|---|---|---|
| Turns | 52-58 | 61-71? | ≤77? | ≥82? |
| Score |
Areas and Maps (Screens)[]
Area 1 - Angel's Memorial

Road to the Promised Land
-[The resting place of the Grim Angels that lost their lives in Ragnarok. Entry is now prohibited.]-
Map
[ 1 ] - [ 2 ] - [ 3 ]
[Stone pillar] Ein: How old is this? It's falling apart.
Rose: Ein, let's get going.
Ein: Okay.

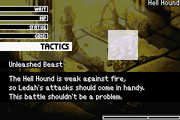
In the first room, Ein and Ledah will encounter a lone Hell Hound after a brief conversation. After the battle, there is a Red Trigger Icon, but it is pointless to use a Trigger Point on it. Upon advancing, Hector will check on the group for a status report.
[Faded floor] Ein: Heaven's Gate...
So much blood has been shed here...
Even so, is history bound to repeat itself?
... All for the sake of Asgard.
Nothing of particular interest happens in the second room, but in the third one, the angels are ambushed by a larger group of angry demons.


When the battle initiates, the Gremlin will always move first, and use his Break Out!, Devastator. The other two demons will aim their attacks on Ein as well. After a somewhat long fight, the player will be forced to return to Room 2, where they will be instructed on Look and Move Modes.
Area 2 - Skywalk
-[A walkway at Heaven's Gate made of floating rocks, leading to a cavern.]-
Map
[ 4 ] - [ 3 ] - [ 5 ] >
...........|
[ 1 ] - [ 2 ]
Room 1

[Ledge above] Ein: That's where we dropped down from.
Rose: You can't go back there anymore, y'know.
Ein: We better explore each area thoroughly then.

[Chest] Rose: Make sure you check stuff like this in Look Mode...
Wow! You actually listened to me for a change.
Ein: Haha... I always listen to you.
Rose: Yeah, right. Alright, let's open it.
Ein: Should I open it?
>Open
-Potions x 03-
Ein: Potions! These'll come in handy.
>Don't open
Rose: Well, better safe than sorry.


Upon entering, there is an optional blue chest containing a Potion, but nothing else.
Room 2

[Pile of rubble] Rose: Did a pillar fall? This place is dangerous.
Ein: Hm?
A rock...
> Take it
- Rock acquired. 500 pts.
Ein: Maybe it'll come in handy.
> Leave it
Ein: There's no reason to pick up a rock.
In the next area, more demons are encountered, and the player will receive instruction on Over Skills. Afterwards, inspect the rubble and take the Rock found in it; it has a use later on.
Room 3

[Sky] Ledah: It's the Sacred Scale that supports Heaven's Gate.
To think I would come to Riviera like this...
How ironic.
Ein: Ledah?
Ledah: ... Don't mind me. We must hurry, Ein.
The third room bears little to significance, but forks left or right.
Room 4

[Rubble] Rose: This way looks pretty hopeless.
Ein: Yeah...
Rose: We're near the area we dropped down from.
The rest of the path collapsed...
Ein: Hm!?

Ultimately results in 3000 points and a Mana Wisp.
First go left, into the fourth room and inspect the dead end. Ein will notice a sparkle, and another inspection will reward you with a Mana Wisp. Return, and head right this time, to the final room.
Room 5

[Open chest] Rose: This chest has already been opened.
Ein: ... ... ... ...
Rose: With all that sand inside, it must be pretty old.
What a bummer... There's no treasure.
Wouldn't it be nice if every chest had something?
I should warn you, though...
Some chests may have traps inside, so be careful.
There's an empty chest and nothing else, and it does not contain anything, so don't waste any TP (Trigger Points); move on to the next area.
Area 3 - Stairway of Judgment
-[The stone stairway where fallen angels were tried. It spirals up to a cavern.]-
Map
[ 1 ] - [ 2 ] - [ 3 ] >
Room 1

[Path] Ein: It keeps going up, like a staircase.
Rose: But I'd hardly call it a path.
After the conversation upon entering this area, move ahead to the next segment and you w


ill find yet another demon encounter, in which Rose will encourage Ein to show off his newly-learned Double Slash.
Room 2

[Path] Ein: The path still continues upward.
Rose: Yeah, but here it's not as steep.
That's a relief, since we don't have much choice.
Ein: Very true.
Afterwards, move ahead.
Room 3

[Path] Ein: Hm? What's that?
Enemy: *hiss*
Rose: A spider!
Ein: What should we do?
Rose: Throw that rock you picked up.
Ein: Alright!
>Throw it.
Next, in the third room, inspect the Path in Look Mode, and Ein will find a


spider demon. Rose will prompt Ein to throw the rock (obtained in the previous area) at it, leading into the first mini game in the playthrough. This one requires that you stop the cursor at a highlighted spot on the bar, as it quickly shifts back and forth along it. If successful, the spider will fall to its death and you will obtain a Spider Web x 25. If you miss, however, you are attacked by not one, but two Arachnes.
Area 4 - Cavern of Judgment
-[The stone steps eventually lead into a cavern. Light gently seeps through the cracks.]-
Map
[ 1 ] - [ 2 ] - [ 3 ] >
In the first segment, check the sunlight; Ein will comment on how beautiful but sad it is, but nothing else will

happen (yet).
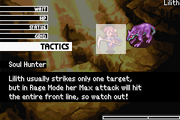
In the next area, the group will be ambushed by an inescapable battle with a Lilith and her companion Hell Hound. After defeating them, use another TP to inspect the sunlight again. Ein and Ledah will remark at how it seems to be focused on a certain spot, and they will find Orihalcon. This is totally for the sake of points, as it has absolutely no use; the player needn't spend two TP on this if they do not wish to.
In the third room, Hector will request another status report, and will scold Ein for questioning his orders, expecting him to blindly do as he's told. After this event, inspect the stairway in Look Mode (TP), and choose the "Hit it" option. This will cause a rockslide, and a mini game will ensue; in this one, the player must press the buttons displayed in the proper sequence within the alotted time. Failing will result in HP loss.
Area 5 - Heaven's Scale
-[Where judgment used to be passed on fallen angels. Giant boulders hang in the sky by chains.]-
Map: [ 1 ]
.........[ 2 ] >
Look Mode is needed to advance further in this area; to open a new path, inspect the Cliff (no TP is needed). Before you go, you should collect the sword that is stuck in the ground. It requires one Point, but is well worth it. Pulling it out will require you to button-mash the A (GBA)/X (PSP) button 12 times within the alotted time. If you pull it off successfully on your first attempt, you will obtain the Dragon Killer with its max uses (x15), as well as a 1 point boost in Strength for Ein. When you're done with this area, jump off the cliff and you'll land in the second part of the area.
Here,

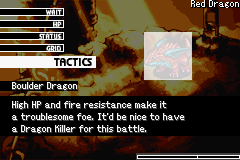
you will meet the game's first mini-boss: a Red Dragon. Ledah's Lorelei does pathetic damage on it; Ein will shine in this battle if you obtained the Dragon Killer in the above room. After the fight, you will be forced into a mini-game similar to the rock-throw one in Stairway of Judgment. If you succeed, you will end up in the Silver Palace; if not, then you'll advance to the Stone Lattice instead.
Area 9 - Silver Palace
-[Ruins of a palace that once held sacred treasures, but was destroyed during Ragnarok.]-
Map
[ 1 ] - [ 2 ] >
In the immediate area, there will be a green chest containing a Key Item: the Album (requires TP).

Advance to the next place, and there will be another hoard of demons waiting for you. After this fight, return to Look Mode and check the Goddess Statue (TP), and Rose will say that there's something in its hand. Check it again, and Ein will receive the a Goddess' Blessing, which will grant him 1 point to his Agility. Also with this room is a roken statue, from which you can obtin the Rusty Sword.
Area 6 - Stone Lattice
-[A path made of rocks chained together. The footing is shaky, but they are seen all over Heaven's Gate.]-
Map
.........[ 4 ] - [ 5 ] >
............|
[ 1 ] - [ 2 ] - [ 3 ]


Once you reach the Stone Lattice from Silver Palace or Heaven's Scale, immediately head to the next room and use Look Mode to inspect the chain (TP); Rose will find a Power Wrist which you can use to Skill Up Ein. In this room, you have the option to climb up to higher elevation or proceed to the right. Head right first, and you will encounter a Naga. If you S Rank this fight, you will receive a Naga Fang, which grants yet another Skill Up opportunity for Ein. Afterwards, you can use Look Mode once again to get the optional Angel's Bell (requires TP).

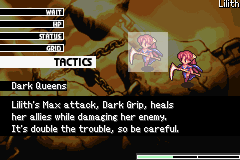
Next, head back to the second room and this time go upward, to room four. Two Liliths will attack the angels. After the fight, head to the fifth and final room and collect the Fire Orb in the blue chest (TP). It's highly recommended to not use this item, and instead save it for the upcoming boss fight against Aghart (refer to the Aghart page for a guide, if needed).
Area 7 - Remote Sanctuary
-[A nameless temple in the southernmost area of Heaven's Gate. Its floor has cracked over time.]-
Map
[ 1 ] - [ 2 ] - [ 3 ] >
Once you reach this area, use a TP to check the blue chest. It will be booby-trapped and Ein will have to get


away from it quickly (mini-game) to avoid HP loss; this is the player's introduction to trapped chests, which will be staple from here on out. There is nothing inside, so don't waste a turn looking at it again.
Proceed to the next room, and you will find your last demon encounter in this chapter. Afterwards, go into Look Mode once more and use TP to check the cracked floor. Choose the first option, and pull it out in the same type of mini game as when you obtained the Dragon Killer. You will receive the Rosier x1 (If you defeated Seth-Rah with an S Rank you Will get Longinus instead of Rosier). As with the Fire Orb, save the Rosier, as it has only one use and can be used later for skilling up in a Practice battle.
Lastly, head on to the third room, and if you switch into Look Mode, the group will find a lost, scared fairy named NoNo. Ledah will tell Ein to leave her there, but if you do take her with you, she restores his HP fully and grants him 1 point to his Magic stat, as well as another reward later on (Ribbon). Proceed to the stage's final area.
Area 8 - Gate to Riviera
-[The southernmost gate of Heaven's Gate. A barrier that prevents anyone from passing.]-
Map
[ 1 ] - [ 2 ] - [ 3 ]
Nothing but plot elements occur in this final area, but if you check the area in Look Mode in the first two

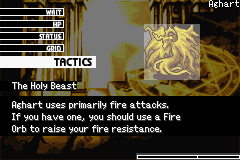
rooms, Ledah will remark at a powerful aura nearby, and you will obtain a 1-use Elixir on the second one (two TPs needed). Once you advance to the third room, you have reached the end of Heaven's Gate Stage 1, and will battle your first Accursed: Aghart, the Holy Beast.
Elendia[]
After battling Aghart, Ursula abducts Ein and tries to put him into eternal sleep. She will later reconsider and drop him off in the village of Elendia, stripping him of his memories and sealing away the power of Einherjar. Ein will wake up in the home of Fia and Lina, his mission and identity (he remembers his name, but nothing else) completely forgotten. After he sees the village, and visits the Elder, he accompanies the two sprites to Lacrima Castle, and the first chapter will end.
Area Gallery[]
")
")
")
")
")
")
")
")
")